Returns: Return for refund within 30 days, Read details »
Buy more, save moreContact Us
The select 0 products
Match the price: 26.90
You save: 0
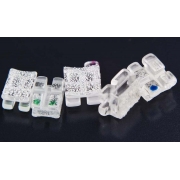
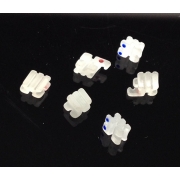
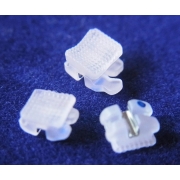
Economical Bondable / Monoblock Metal Brackets, 5-5 /20 Pcs (Unit), MOQ : 10 Sets
(10)
$7.99
Original Price
$10.99
You save
$3.00
-180x180.JPG)
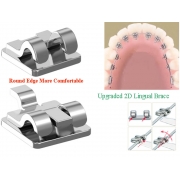
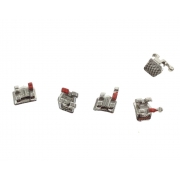
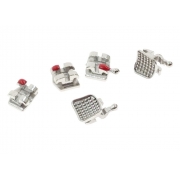
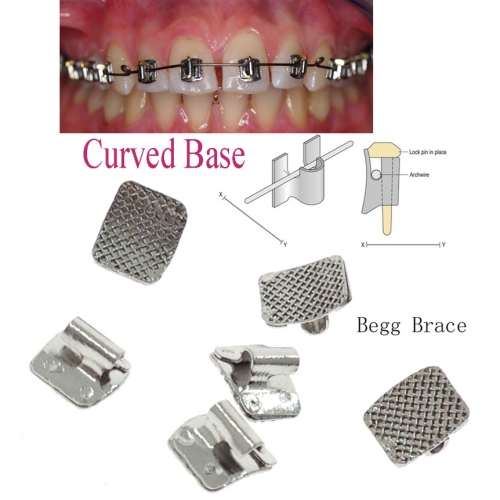
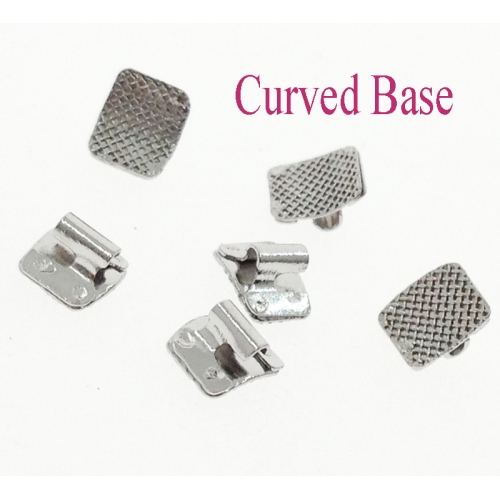
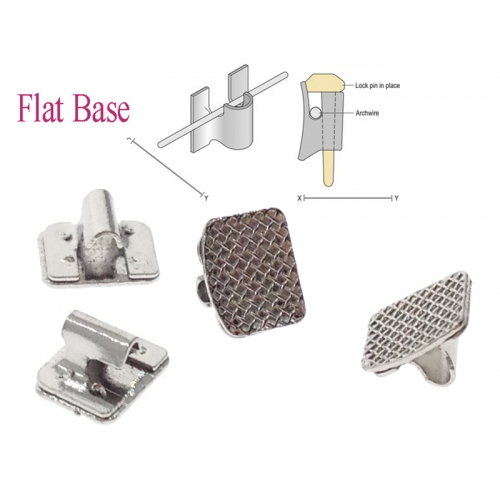
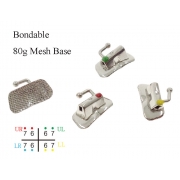
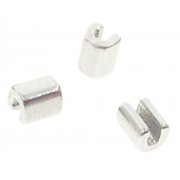
Bondable Begg Bracket
Packing: 100 Pcs / Pack
In this age of cosmetic dentistry most general dentists should have some knowledge of orthodontic treatment. At least enough knowledge so they know what is possible orthodontically to enhance the restorative results for their adult patients. Actually, analysis of the orthodontic problem is the hardest part. If they have enough knowledge to assess the problem and the solution, the mechanics are fairly simple, especially when utilizing the Begg 256 bracket.
I don't know what your dental school experience was in the orthodontic department. At my school one of our first projects was to take an .030 stainless steel wire and bend the wire from #18 to #31 around the buccal gingival necks of the teeth! I am convinced to this day the project's sole purpose was to discourage all GP's from ever touching an orthodontic wire again. Don't panic! The orthodontic treatment I am about to describe isn't even nearly as tough as my initial dental school project.
|
What are the advantages of the Begg bracket for limited orthodontic movement for the General Dentist? The biggest advantage is you only need one bracket! Yes, you can use the same bonded bracket on any tooth upper and lower from bicuspid to bicuspid. Actually, I would prefer two bases, one is curved slightly with mesh for bonding bi's and canines, the other is flat based for the incisors. Other techniques require a different bracket for each tooth. That means a possible inventory of 20 different brackets plus backups in case some brackets are lost or broken. Other types of brackets are also greater in cost than the typical Begg bracket. The third big advantage lies in anchorage control. Other brackets and techniques build torque into the bracket and don't allow free tipping. This means that teeth must move bodily. Bodily movements of teeth require greater anchorage to gain movement in the correct directions. Begg brackets allow free tipping and are ideal for segmental archwires. |
|
Many general dentists that do limited ortho struggle with removable appliances and sometimes fall short on results because of the removable appliance's limitations and/or lack of good patient cooperation. Many other general dentists know they are limited by removable appliances so they ship off the patient to a specialist. The specialist insists on ideal treatment. The patient really wants only their front teeth to be aligned. They don't want full treatment lasting 2 years or more. The end result, the patient receives no treatment. I find that I can achieve a reliable, excellent, and efficient results by bonding a few Begg brackets and placing a nitinol wire. I also find that I can achieve these good results in much less time, both my time and the patient's time when I use fixed Begg appliances.
Two types of cases come to mind that lend themselves well to limited orthodontic treatment. The first type case is the adult with upper or lower crowded anteriors 5mm or less space needed to uncrowd the teeth. The second type of case is the anterior spaced patient, usually a large diastema. In the diastema case, if restorative dentistry is all you know, you will be tempted to place two porcelain veneers on the central incisors and be done with the case. Usually, in the larger diastema cases the esthetic result is much better if you first move the centrals together part of the distance and place four veneers on the teeth lateral to lateral. I will proceed to describe the steps necessary to treat both types of cases.
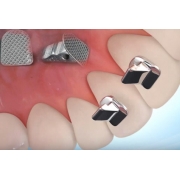
Take good records, photos, make sure you have X-rays of the teeth to be moved, and study models. After you have determined that you need 5mm or less space to uncrowd the anterior teeth and that the opposing arch doesn't have any teeth that will not allow the uppers to be aligned (crossbites, extruded and misplaced teeth etc.), you are ready to place your brackets. ( SEE Figure 1) Note: you do not need to use jigs to align brackets but you do need to understand placement differences on upper and lower teeth shown in the diagram.
 |
 |
| Before | After |
|---|
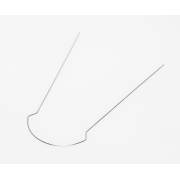
We typically prophy the teeth, etch, place unfilled resin on the tooth and the back of the bracket and then filled resin on the bracket. We then position the bracket on the tooth. We usually mix enough bonding material to place 3 brackets at a time. We are using a self cure resin. Allow the resin to set for about 5 minutes then you are ready to proceed with obtaining space and wire placement. You can gain some space, in some cases, by just rounding out the arch form. We usually obtain space by using ARS (air rotar stripping) as advocated by Dr. Sheridan. Sometimes you must wait for the teeth to align somewhat before you have good access to trim the contacts properly. I find two excellent ways to do this. For tight contacts that I don't want to remove more than a 1/2mm I will use a double sided diamond disc that fits in my straight low speed handpiece for contacts that I can trim a little more I will use a 699 carbide. In both cases you want to shape the contacts back to normal form and polish them. After I have provided for space (as I can and is necessary) I will fabricate the archwire. We use a pre-formed round nitinol .016 wire. I trim the gross excess from the distal ends and try the wire in the mouth. I mark the wire distal to the last bracket on each side. A laundry pencil will mark the wire . I take the wire out of the mouth and make 45 degree bends at those points toward the lingual side of the wire. These bends help keep the wire from moving from side to side through the brackets. I place the wire back into the brackets and pin the wire to place. We give the patient home care instructions, including flossing, and some utility wax(clear) to place on any resulting sore areas. I see them back in 4 weeks.
|
At the four week visit I may use ARS to provide for some more space in areas that were malpositioned in such a way at the first visit that I couldn't shape the contacts properly. I probably would not change the wire just yet. Another 4 weeks and the teeth should be fairly well aligned. I may switch to hard wire, round austrailian .016, and make some minor bends to correct some minor rotations that the nitinol wire hasn't corrected. Also if a root is mesially or distally tipped I will place uprighting springs to correct that problem. The stiff .016 wire must be used if you are using uprighting springs. I would also recommend that you tie a ligature tie from the distal most tooth to the distal most tooth when the springs are used or you may open up space in the arch as you upright. Vary the visit timing according to how much uprighting you need. (You will have to develop a feel for this from your experience ) I would suggest 3 weeks until you develop some experience. When all teeth are aligned properly leave the wire in place for a few additional weeks without springs etc. to allow some stability before you remove the brackets. |
|
I remove the brackets with a bracket removal plier, polish the remaining cement off using a 1157 carbide in a dry field, medium grit Moores disc, then prophy paste. We take final records and include impressions for the retainers. The retainer of choice is the Essix, also advocated by Sheridan. A regular Hawley can be used if you wish. (Perhaps in a later article I can summarize how you can make an Essix retainer in your office). The patient is brought back within a week and instructed how to care for and wear the retainer (Full time 1 year then at night after the first year).
In cases of patients with large diastemas the initial visit is the same except you will not need to do any ARS work. If the teeth are fairly well aligned you may be able to place the hard wire at the first visit. The second visit you will need to place an .016 austrailian wire and show the patient how to place a rubber band from central to central bracket. They should change the rubber band daily. Use a size rubber band that will place about 21/2-3 ounces of force on the teeth. The next visit assess if the incisal portion of the tooth has moved enough. If it has, assess the root position. If you have to move the centrals more than a mm or so you probably will need to upright the roots toward the midline. Place uprighting springs with the arms toward the mesial and be sure to tie the centrals together with ligature wire or the springs will just move the crowns back distally. When the teeth are properly aligned remove braces and make a retainer. You may take the impression for the veneers at this visit also. Have the patient in as soon as possible for the retainer (you don't want those teeth to move---many times I will bond a wire (a braided wire works best) on the lingual of the centrals for extra insurance against movement). The next visit place the veneers and take a new impression for a new retainer (if you are using an Essix type) (if you are using a Hawley you may be able to adjust the labial wire to accommodate the veneers).
 |
 |
| Before | After |
|---|
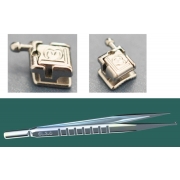
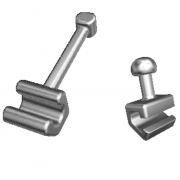
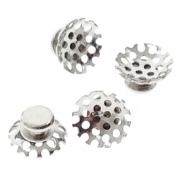
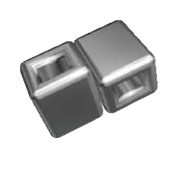
I have included some other pictures that may be helpful including pictures of the major instruments you will need. I have also included before and after photos of models of two patients my associate Dr. Greg has completed. Case one was a flared anterior case with a large diastema between 9 and 10. No ARS was necessary in this case. Case two required the extraction of one lower incisor to allow enough room for the excellent result.


")


-180x180.jpg)
-180x180.jpg)
-180x180.jpg)